在服务器上配置Clash代理
最新更新于: 2026年5月2日晚上6点36分
2026.4.9: Clash可视化面板 更新mihomo默认的dashboard: metacubexd的使用方法
新版的mihomo已经可以代替clash内核了(这个名字在恶搞米哈游),使用方法和原来基本一样,并支持更多配置文件格式,FlClash也使用的是mihomo内核,解析的config.yaml文件会导致clash无法启动,推荐直接使用mihomo内核
参考 Linux 服务器安装 Clash代理
安装 Clash 内核
在服务器上由于没有可视化窗口,所以只能直接运行 Clash 内核,下载 clash-linux-amd64-v3GitHub下载, clash.la下载 可以直接在命令行中启动 Clash:
mkdir clash-core  # 创建文件夹
cd clash-core
wget https://github.com/WindSpiritSR/clash/releases/download/v1.18.0/clash-linux-amd64-v3-v1.18.0.gz  # 下载内核
gunzip clash-linux-amd64-v3-v1.18.0.gz  # 解压得到一个文件
chmod +x clash-linux-amd64-v3-v1.18.0  # 赋予执行权限
mv clash-linux-amd64-v3-v1.18.0 clash  # 重命名该文件
安装 Clash (mihomo) 内核
在服务器上安装 Clash (mihomo) 内核,下载mihomo-linux-amd64-compatible-v1.19.24.gz
mkdir clash-core  # 创建文件夹
cd clash-core
wget https://github.com/MetaCubeX/mihomo/releases/download/v1.19.24/mihomo-linux-amd64-compatible-v1.19.24.gz
gunzip mihomo-linux-amd64-compatible-v1.19.24.gz
chmod +x mihomo-linux-amd64-compatible-v1.19.24
mv mihomo-linux-amd64-compatible-v1.19.24 clash
下载配置文件
在VPN代理网站上可以找到 Clash 配置文件托管链接,我们记为 https://url,在刚才 Clash 文件夹中执行如下命令下载配置文件 config.yaml:
wget -O config.yaml \
  --header="User-Agent: Clash" \
  https://url  # 将配置文件写入到config.yaml文件中(第二行是伪装成Clash内核的请求头)
如果发现连接下载的是还是乱码,就直接打开本机的Clash(flclash, clash-verge等使用mihomo内核的)编辑配置文件,复制文件内容覆盖到 config.yaml 中保存。
启动代理
首先查看 config.yaml 文件,查看其中的 mixed-port 是多少,例如我这里是:
mixed-port: 7890  # http, https, socks 代理端口

# 旧版本的port和socks-port参数
port: 7890  # http, https 代理端口
socks-port: 7890  # socks 代理端口
在启动 Clash 代理后,我们需要将环境变量中的端口代理设置为上述端口号,为方便起见我们在 ~/.bashrc(或~/.zshrc) 中加入函数方便启动与关闭代理:
# 开启代理
function proxy_on(){
  MIXED_PORT=7890  # change port 7890 to mixed-port
  export all_proxy=socks5://127.0.0.1:$MIXED_PORT
  export http_proxy=http://127.0.0.1:$MIXED_PORT
  export HTTP_PROXY=http://127.0.0.1:$MIXED_PORT
  export https_proxy=http://127.0.0.1:$MIXED_PORT
  export HTTPS_PROXY=http://127.0.0.1:$MIXED_PORT
  echo -e "Proxy enabled on port $MIXED_PORT - ENV [all_proxy, http_proxy, HTTP_PROXY, https_proxy, HTTPS_PROXY]"
}

# 关闭代理
function proxy_off(){
  unset all_proxy
  unset http_proxy
  unset HTTP_PROXY
  unset https_proxy
  unset HTTPS_PROXY
  echo -e "Proxy disabled - ENV [all_proxy, http_proxy, HTTP_PROXY, https_proxy, HTTPS_PROXY]"
}
修改完成 .bashrc 文件后,执行 source ~/.bashrc,通过输入命令 proxy_on 即可打开端口代理,proxy_off 即可关闭端口代理。
由于启动Clash还会自动下载mmdb和geoip等文件,这些文件可能需要代理才能下载,建议在 config.yaml 最后添加如下配置避免自动下载卡住:
geox-url:
geoip: "https://testingcf.jsdelivr.net/gh/MetaCubeX/meta-rules-dat@release/geoip.dat"
geosite: "https://testingcf.jsdelivr.net/gh/MetaCubeX/meta-rules-dat@release/geosite.dat"
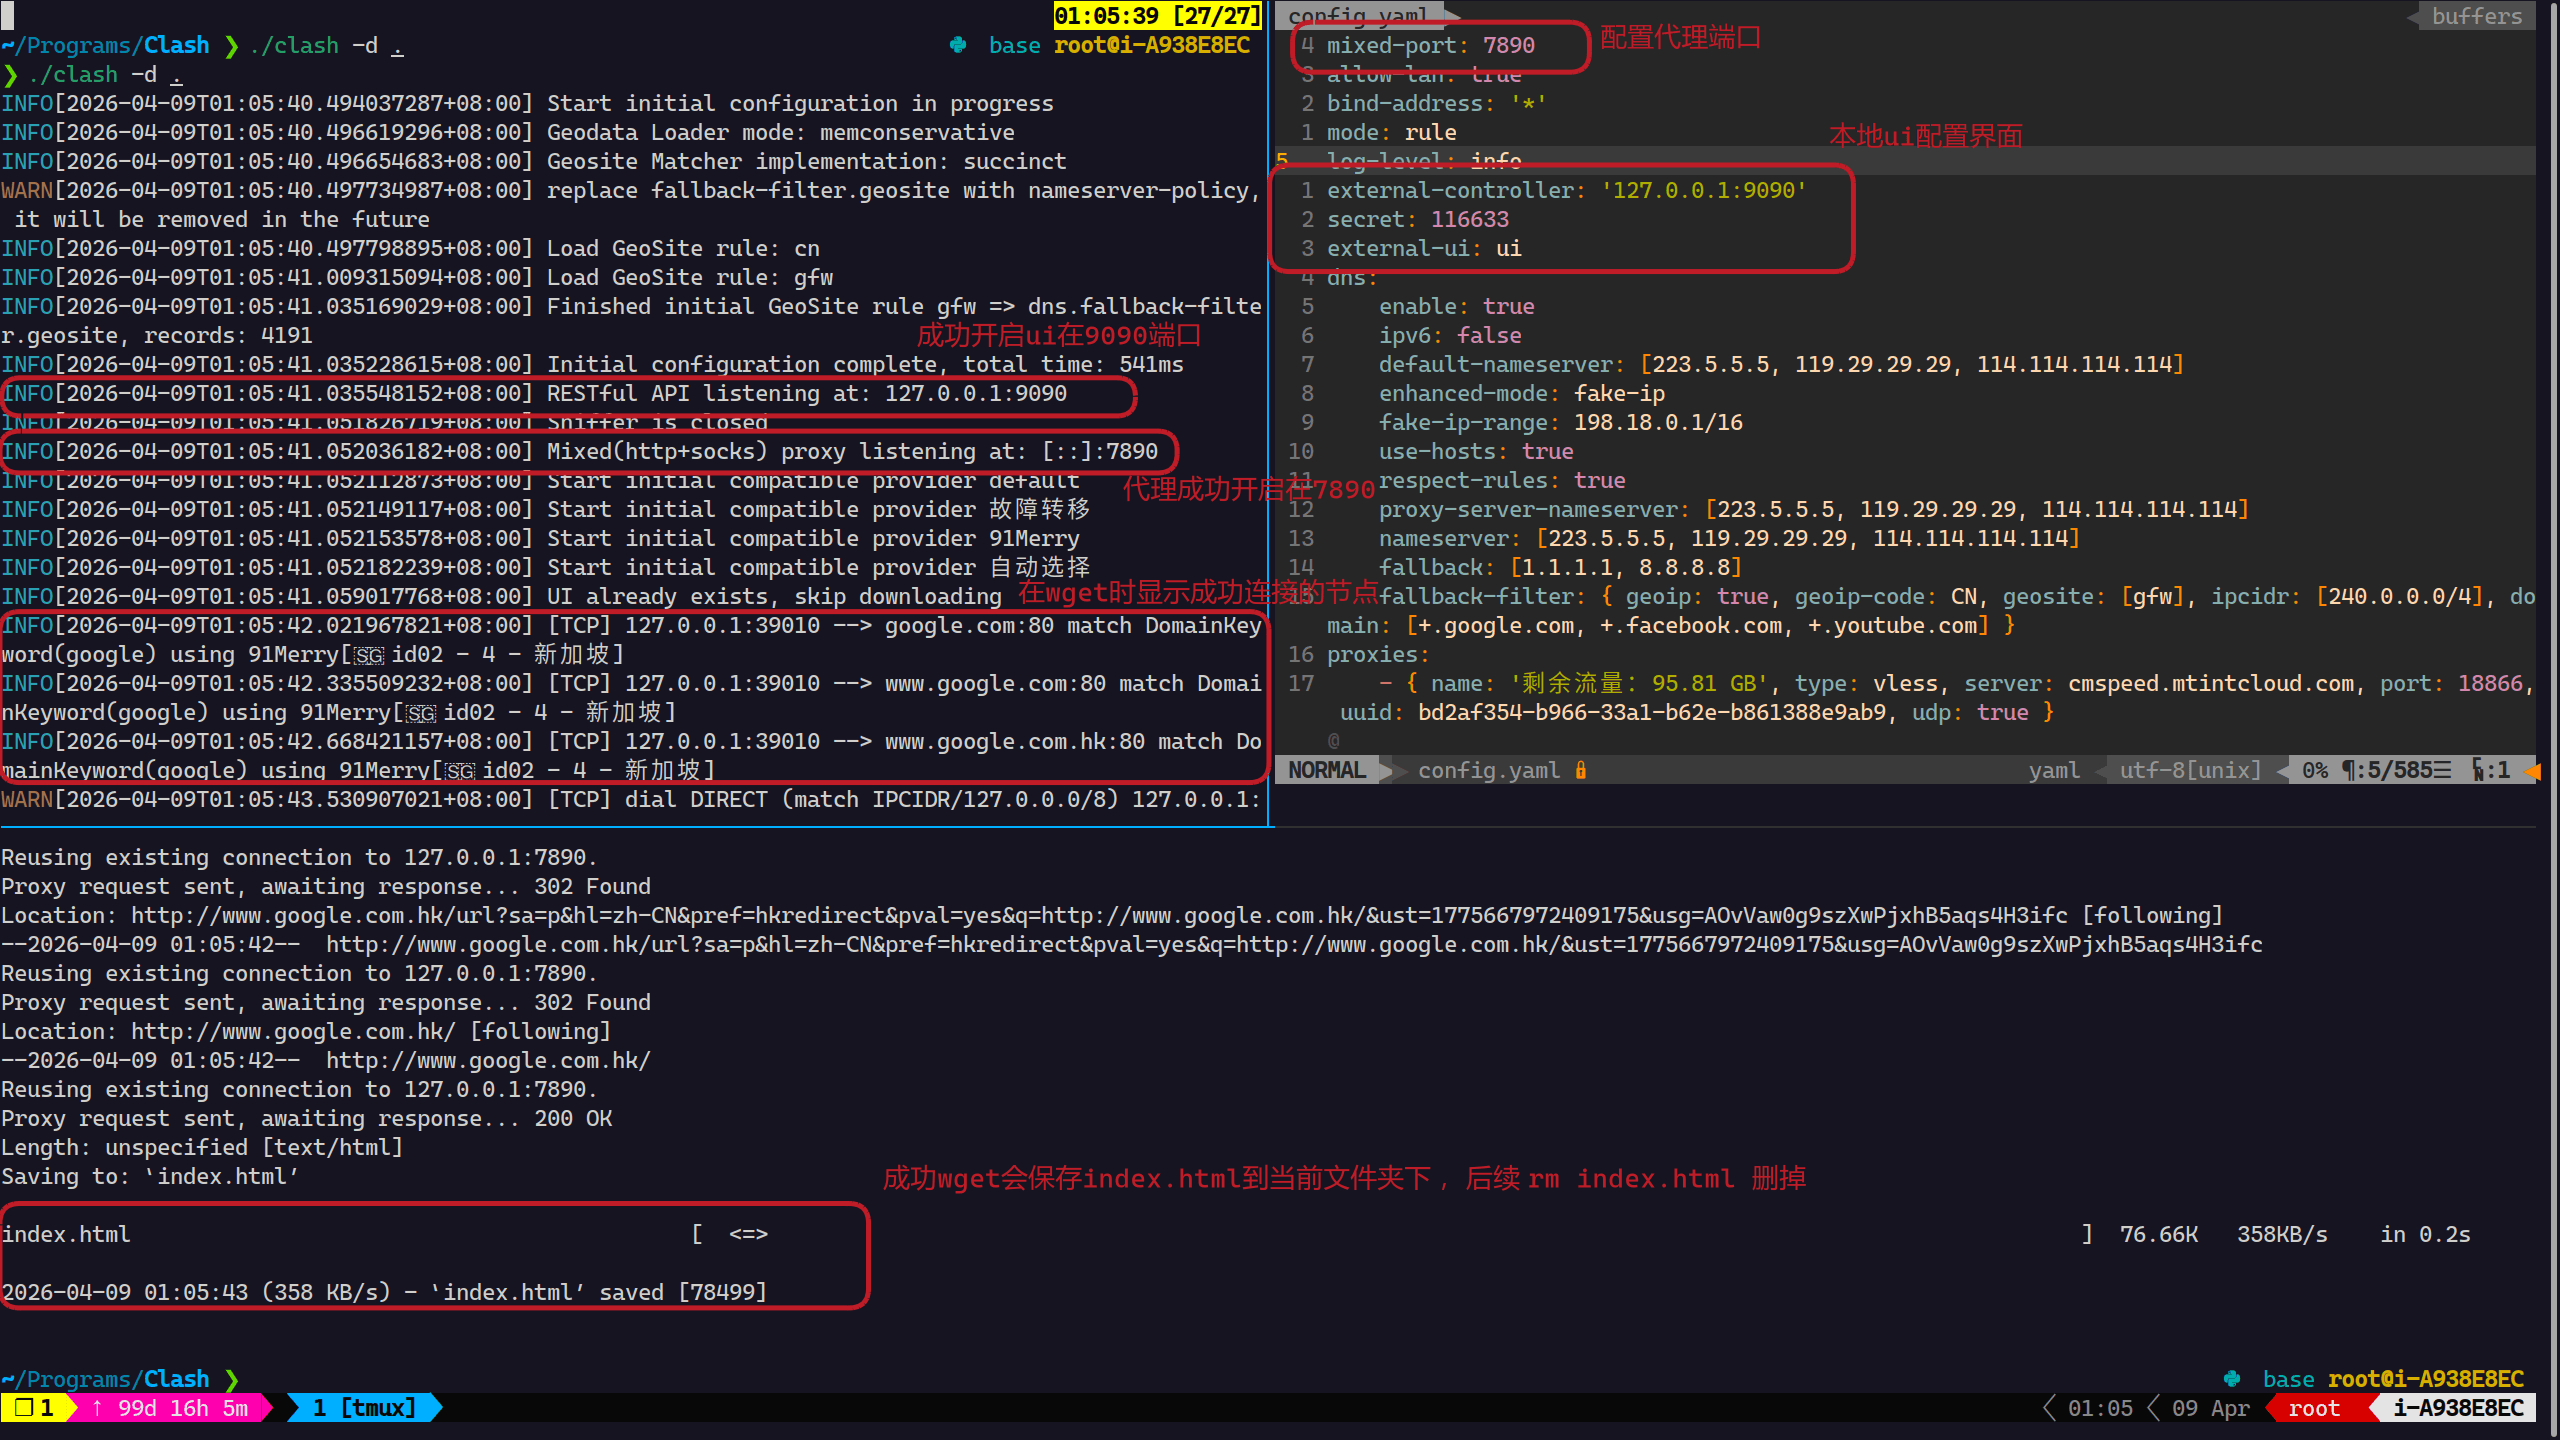
mmdb: "https://testingcf.jsdelivr.net/gh/MetaCubeX/meta-rules-dat@release/country.mmdb"下面就是启动 Clash 代理了:
./clash -d .  # 启动代理(这会占用一个终端界面,如果要挂在后台执行,推荐使用tmux)
proxy_on  # 启动端口代理
wget google.com  # 测试是否可以连上外网
rm index.html  # 删除测试文件
我们可以在 tmux 中的一个 pane 中执行 ./clash -d .(服务器上无管理员权限安装tmux可以参考在服务器上配置shell及神经网络框架 - 使用编译安装),效果如下所示
Clash可视化面板(metacubexd)
如果上面还是无法连接到外网,可能是节点选择问题,我们可以使用mihomo默认的ui界面进行配置 GitHub - metacubexd,通过可视化面板对节点进行选择,使用方法非常简单
我后来发现无需手动下载ui界面,直接在 config.yaml 中配置后,会自动下载ui界面并解压到 ui 文件夹中,这样更方便
wget https://github.com/MetaCubeX/metacubexd/releases/download/v1.244.2/compressed-dist.tgz  # 下载面板
# 将面板上传到服务器的Clash文件夹中 (用vscode或者scp命令都可以)
scp compressed-dist.tgz [你的服务器]:/path/to/your/clash-core  # 将面板上传到服务器的clash-core文件夹中
# 服务器上
mkdir ui  # 创建 ui 文件夹
tar -xvf compressed-dist.tgz -C ui  # 解压到 ui 文件夹中
vim config.yaml  # 配置 config.yaml 文件
在 config.yaml 文件中修改下述三个参数:
external-controller: '127.0.0.1:9090' # UI端口号为9090(如果占用随便换一个)
secret: 123456 # 密码
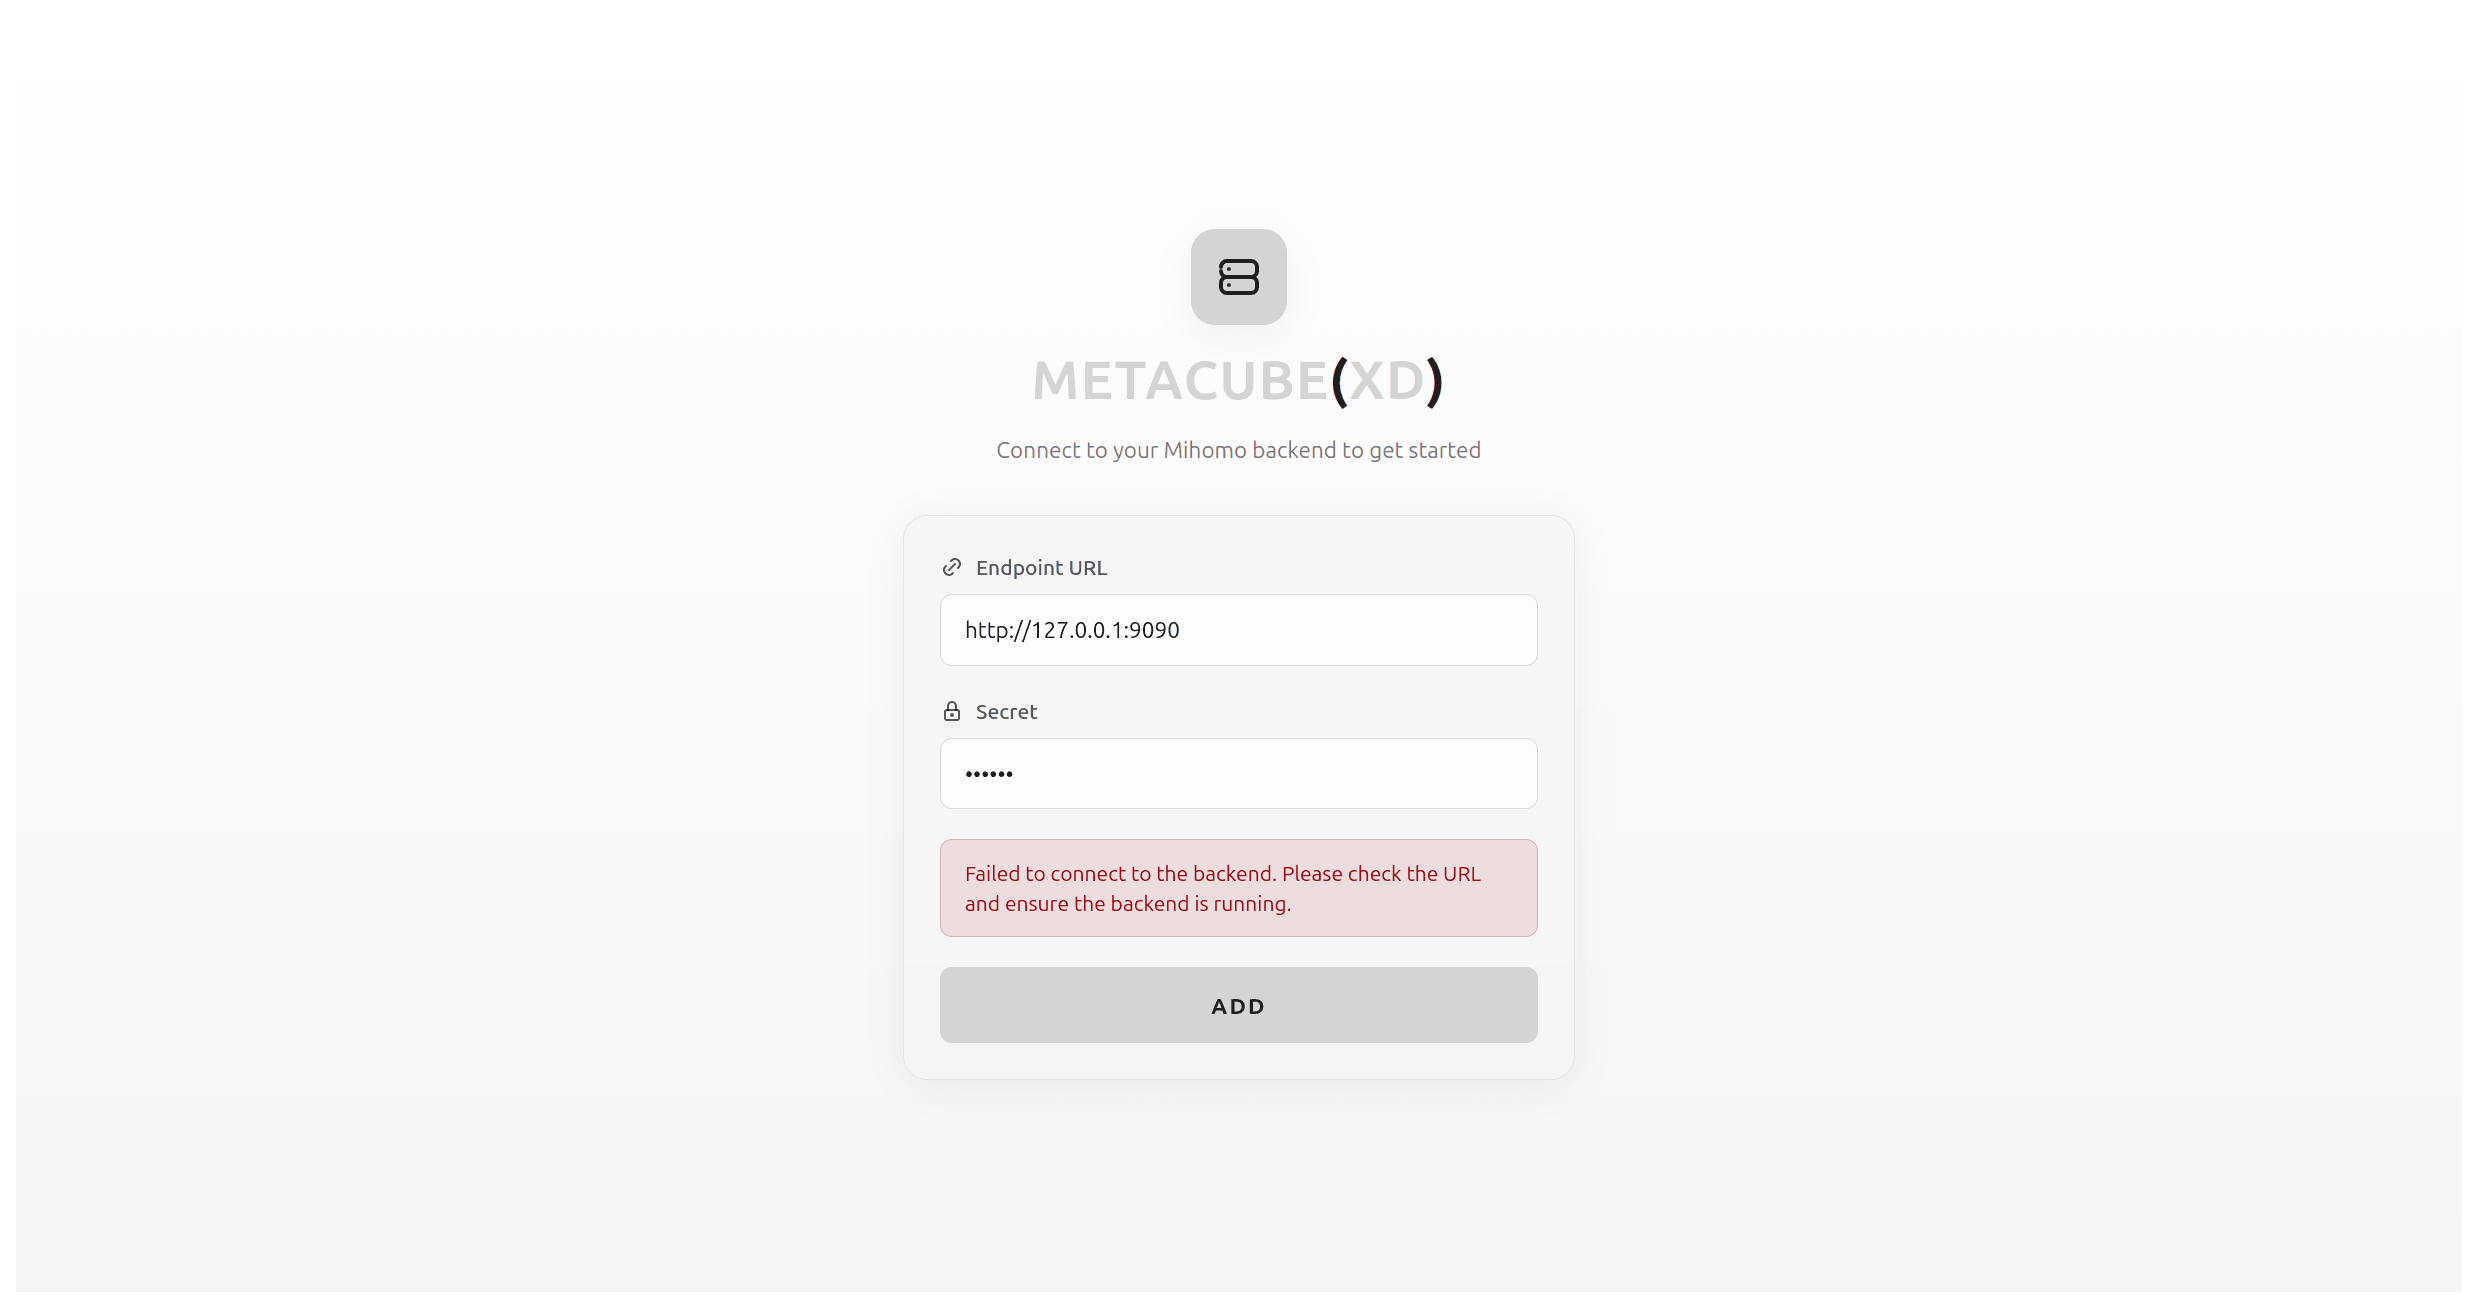
external-ui: ui # 打开本地面板文件夹名称再次启动 ./clash -d .,使用vscode连接上服务器,在下方端口中点转发端口,输入你配置的网页端口,例如9090,然后在浏览器中访问
打开http://localhost:9090/ui/#/setup出现如下界面,输入Endpoint URL为http://127.0.0.1:9090,密码123456,点击ADD
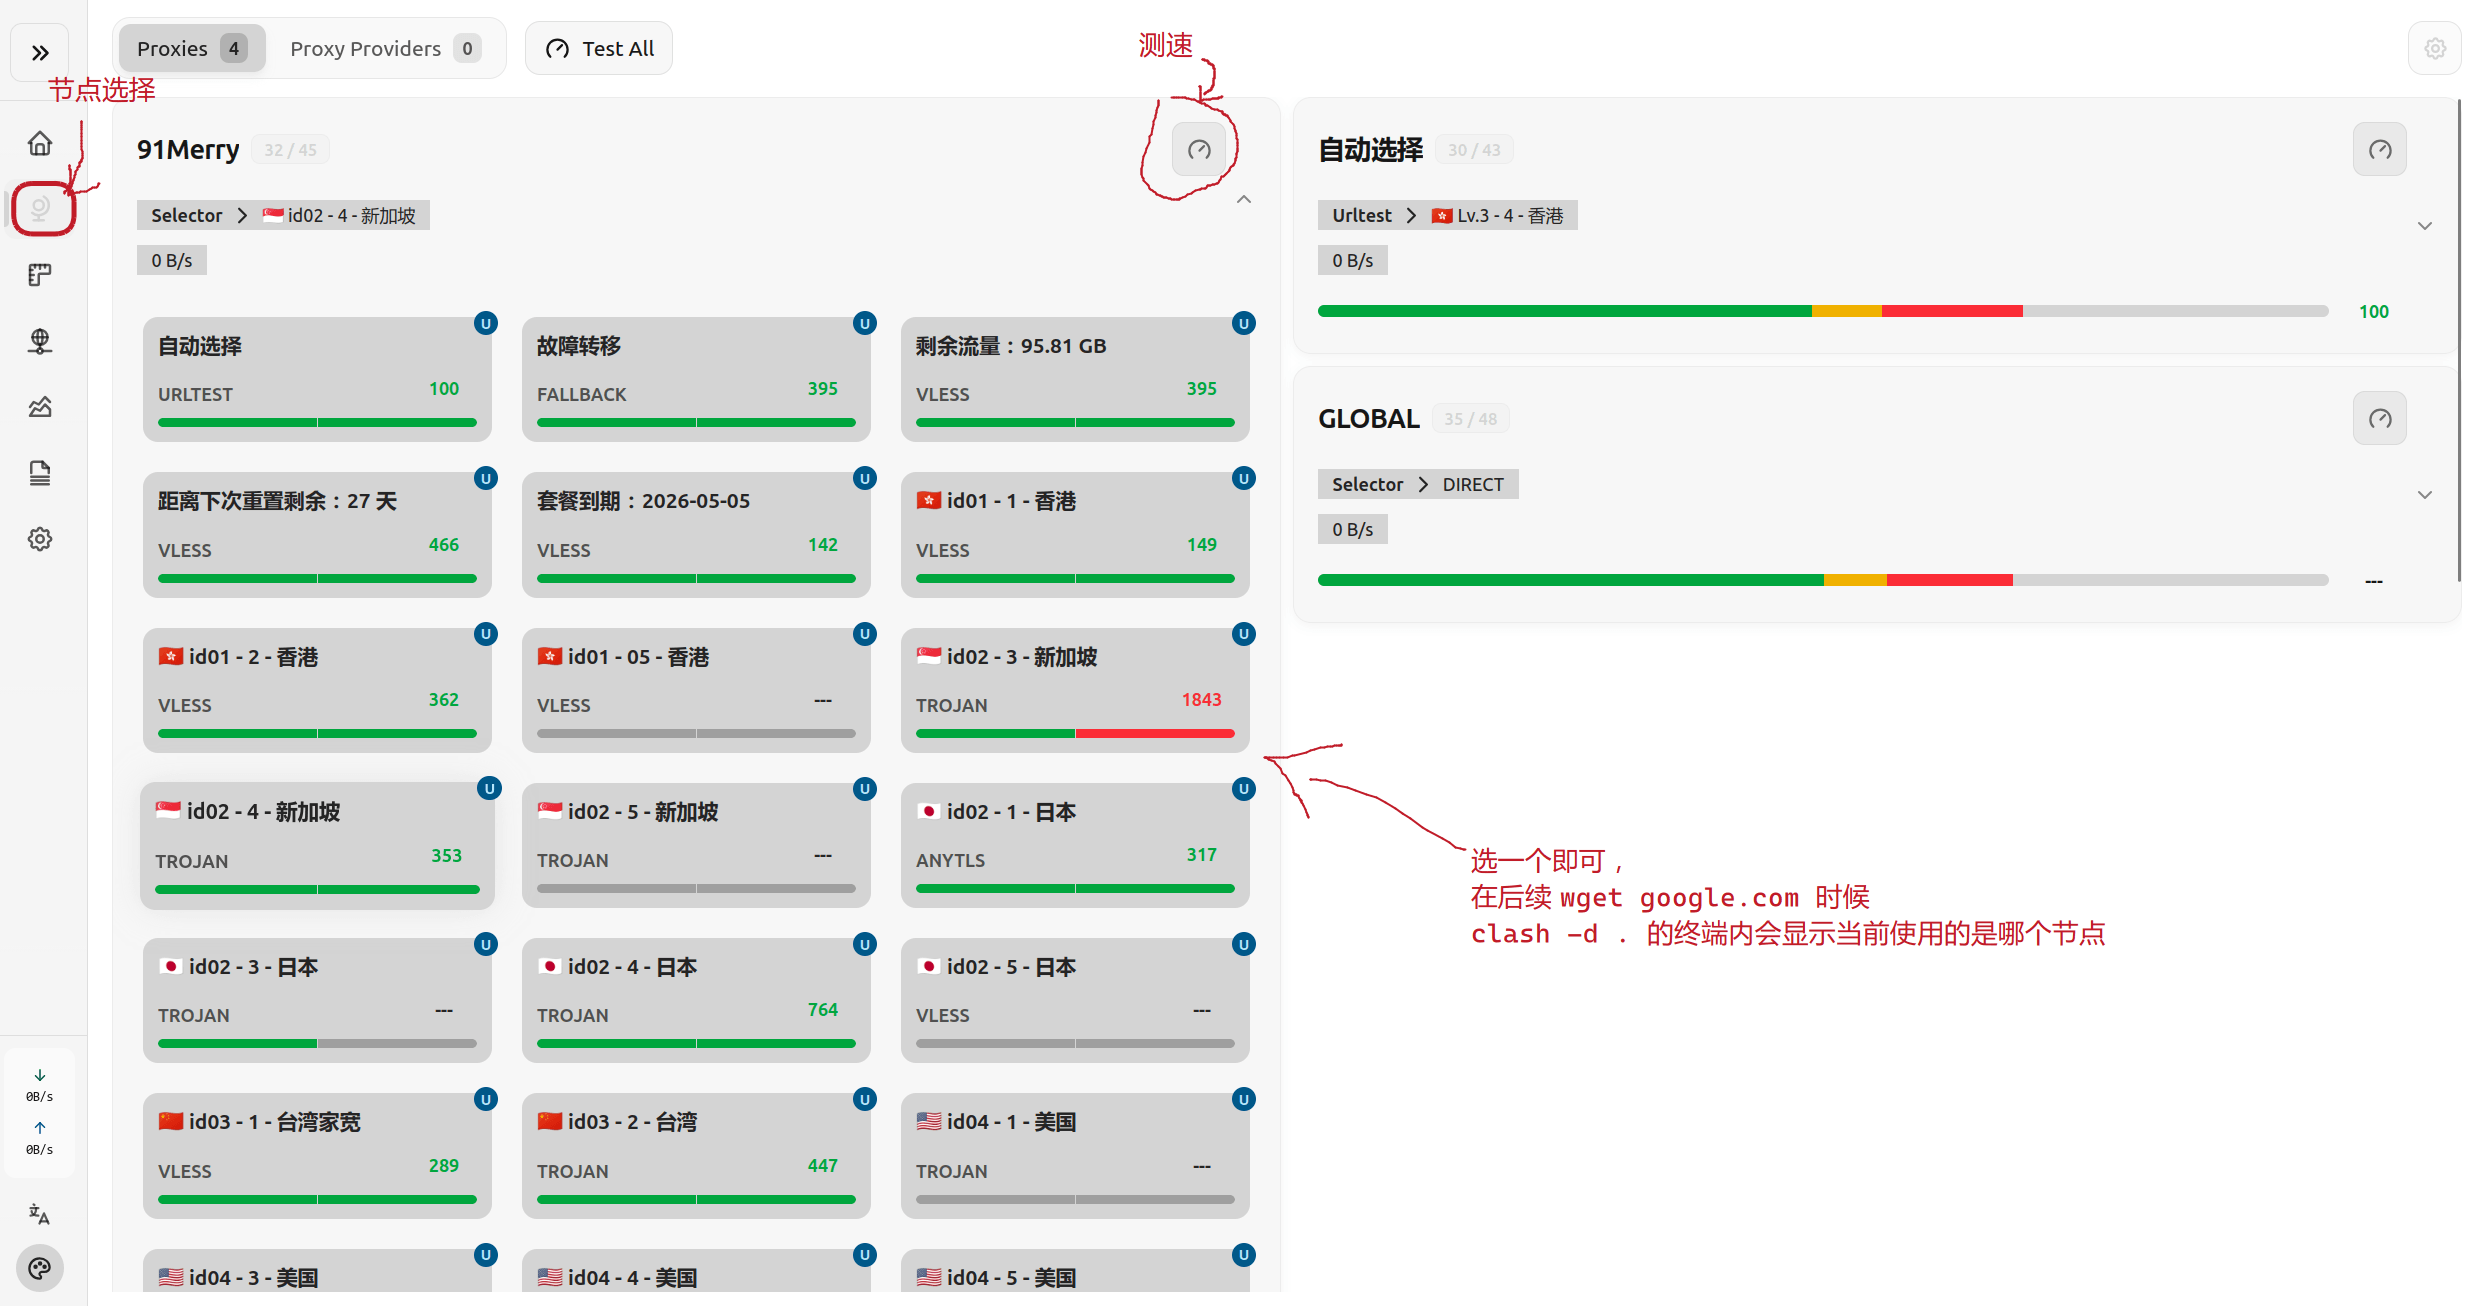
自动跳转后点击左侧第二个按钮 Proxies 进入 http://localhost:9090/ui/#/proxies 就可以选择节点了,如下所示:
一键启动脚本
设置启动脚本放在 ~/.local/bin/start-clash 中,内容如下所示,~/Programs/clash-core 替换成你的 clash 所在文件夹路径:
#!/bin/bash
cd ~/Programs/clash-core || exit 1
if pgrep -f "./clash -d ." > /dev/null; then
    echo "clash is running, skip starting"
else
    exec ./clash -d .
fi赋予可执行权限:chmod +x ~/.local/bin/start-clash,这样在终端里直接运行 start-clash 就可以启动 Clash 了。
自动启动(最好不在共用服务器上自动启动)
创建 systemd 用户服务文件
mkdir -p ~/.config/systemd/user/
vim ~/.config/systemd/user/clash.service
贴入如下信息
[Unit]
Description=Clash Core Service
After=network.target

[Service]
Type=simple
ExecStart=/home/lab/.local/bin/start-clash  # 修改为你的启动脚本路径
Restart=on-failure
RestartSec=5s

[Install]
WantedBy=default.target
启动服务
# 重新加载 systemd 配置,让它认识新的服务文件
systemctl --user daemon-reload

# 设置服务开机自启
systemctl --user enable clash.service

# 立即启动服务(验证配置是否成功)
systemctl --user start clash.service

# 查看服务状态
systemctl --user status clash.service